Step-by-Step Guide to Installing Heavy Duty Racks for Warehouses

Introduction

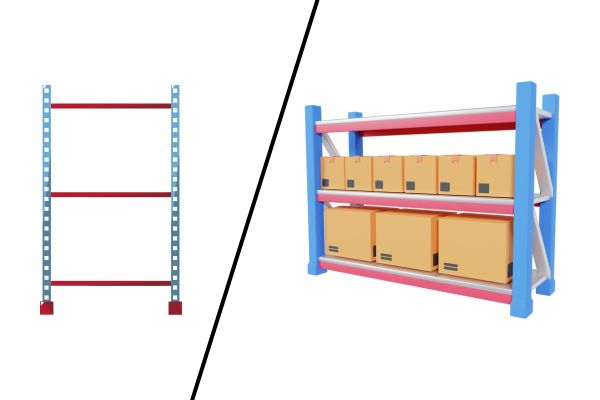
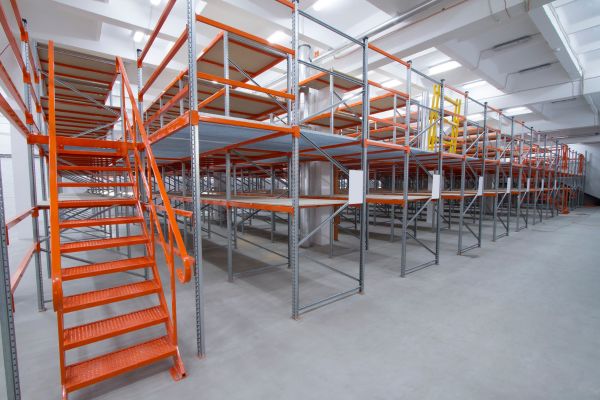
Heavy-duty racks are the backbone of industrial storage, widely used in warehouses, manufacturing plants, and distribution centers. Proper installation is crucial to ensure safety, efficiency, and durability. A poorly installed rack system can lead to structural failures, costly damages, and even workplace injuries.

This guide provides a step-by-step approach to installing heavy-duty racks, covering preparation, installation, safety considerations, and post-installation checks. Whether you're a rack manufacturer or a supplier looking to enhance your installation process, this guide will help you execute a safe and reliable setup.

Why Proper Installation Matters

Heavy-duty racks are designed to hold substantial loads, often exceeding several tons. A small miscalculation or oversight during installation can compromise the entire structure. Proper installation ensures:

Benefits of Using Cable Trays

  • Stability and Safety: Reducing the risk of collapse and workplace hazards.
  • Optimal Load Distribution: Preventing racks from tilting or bending under pressure.
  • Longevity of Storage Systems: Ensuring durability with minimal maintenance.
  • Efficient Space Utilization:Maximizing warehouse capacity without wasting space.

By following a systematic installation process, manufacturers can deliver high-quality storage solutions that last for years.

Step 1: Pre-Installation Preparation

Before assembling heavy-duty racks, a thorough pre-installation assessment is essential. This phase helps prevent errors and ensures a smooth workflow.

1.1 Assess the Installation Site

  • Measure the total available space, including height, width, and depth.
  • Check for uneven flooring or obstructions that might interfere with the racks.
  • Ensure there is adequate clearance for forklifts and other equipment.

1.2 Understand Load Requirements

  • Determine the weight capacity required for each rack.
  • Classify stored goods based on their weight distribution (uniform, point loads, or dynamic loads).
  • Consider seismic factors if installing in an earthquake-prone region.

1.3 Gather Necessary Tools and Materials

A well-prepared team can complete the installation faster and more efficiently. Standard tools required include:

  • Wrenches and screwdrivers for tightening bolts.
  • Drills and anchors for securing racks to the floor.
  • Leveling tools to ensure proper alignment.
  • Safety gear (helmets, gloves, safety shoes) to protect installers.

1.4 Ensure Compliance with Safety Regulations

Rack installation should comply with OSHA guidelines, ANSI standards, and local building codes. Ensuring compliance not only enhances safety but also prevents legal complications.

Step 2: Assembling the Heavy-Duty Racks

Once the preparation is complete, it's time to assemble the racks systematically.

2.1 Marking and Measuring the Installation Area

  • Use chalk lines or markers to outline the rack positions on the floor.
  • Double-check spacing to ensure alignment with warehouse operations.

2.2 Setting Up the Upright Frames

  • Lay out all upright columns and connect horizontal bracing.
  • Ensure the frames are plumb and level before tightening bolts.
  • Secure them using floor anchors to enhance stability.

2.3 Installing Beams and Cross Bracing

  • Attach horizontal beams to the upright frames.
  • Use locking pins or safety clips to secure the beams in place.
  • Add diagonal bracing to reinforce the structure.

2.4 Placing Load Supports (Shelves, Pallet Supports, Wire Decking)

  • If using wire decking, ensure it fits snugly between beams.
  • For pallet racks, install pallet supports at regular intervals.
  • Check for any loose connections before proceeding.

2.5 Bolting Down the Racks

To prevent accidental movement or tipping, racks should be securely anchored to the floor.

  • Use expansion bolts for concrete floors.
  • Check that the rack structure is level and stable before proceeding.

2.5 Bolting Down the Racks

To prevent accidental movement or tipping, racks should be securely anchored to the floor.

  • Use expansion bolts for concrete floors.
  • Check that the rack structure is level and stable before proceeding.

Step 3: Safety Checks and Load Testing

Once the racks are installed, performing safety checks is non-negotiable. This step ensures the racks can handle the intended load and meet safety standards.

3.1 Conduct a Stability Inspection

  • Check for any misaligned beams or loose bolts.
  • Ensure that all beams are fully locked into place.
  • Confirm that rack columns are vertical and not leaning.

3.2 Perform Load Testing

  • Start by loading lighter items first, gradually increasing weight.
  • Monitor the rack structure for any signs of bending or shifting.
  • If using forklifts, test maneuverability around the racks.

3.3 Verify Compliance with Safety Standards

  • Ensure that weight limits are clearly labeled on each rack.
  • Check that aisle spacing meets industry guidelines for easy access.
  • Implement anti-collapse mesh or backstops if required.

Step 4: Post-Installation Maintenance and Best Practices

After installation, continuous maintenance helps prolong rack lifespan and prevent failures.

4.1 Establish a Routine Inspection Schedule

  • Conduct monthly visual checks for damages or misalignments.
  • Perform a full structural inspection every 6 to 12 months.

4.2 Train Warehouse Staff on Rack Safety

  • Educate forklift operators on proper loading and unloading techniques.
  • Emphasize weight distribution to prevent overloading.

4.3 Implement Preventive Measures

  • Use column protectors and impact guards to reduce forklift damage.
  • Install safety netting to prevent items from falling.
  • Replace damaged beams or uprights immediately.

Common Mistakes to Avoid During Installation

Even experienced installers can make critical mistakes that compromise rack safety. Here are a few to watch out for:

  • Ignoring Floor Leveling: Uneven flooring can cause racks to lean or collapse.
  • Skipping Safety Anchors: Unsecured racks are more likely to tip over.
  • Over Tightening Bolts: This can weaken connections over time.
  • Neglecting Load Limits: Overloading racks beyond capacity increases failure risk.
  • Improper Beam Placement: Misaligned beams reduce structural integrity.

Avoiding these mistakes can enhance durability and reduce maintenance costs in the long run.

Conclusion

Installing heavy-duty racks is a meticulous process that requires planning, precision, and safety awareness. By following this step-by-step guide, manufacturers can ensure stable, long-lasting storage solutions for their clients.

At JKR Engineering, we understand that the foundation of an efficient storage system lies in its precise installation and long-term reliability. By following a structured approach to installing heavy-duty racks, businesses can maximize safety, optimize space, and enhance operational efficiency.

Our commitment to engineering excellence and industry-best practices ensures that every rack system we deliver is built to withstand heavy loads while maintaining structural integrity. Whether you need customized racking solutions or expert guidance on installation, JKR Engineering is your trusted partner in industrial storage.

For high-quality, durable, and precision-engineered heavy-duty racks, connect with JKR Engineering today. Let's build storage solutions that stand the test of time.